Part 2 ended with a working motherboard sitting on a cardboard box and one thing left to buy: a case that could actually breathe. This is the assembly, which took longer than the electronics did and taught me more.
None of what follows is hard. All of it is the kind of thing that costs you forty minutes because nobody mentions it.
The case
A Circle Defender ZX7 — white, panoramic glass, ATX mid-tower, seven ARGB fans pre-installed.
The choice was a direct reaction to part 1. The old case had a non-modular PSU crushed flat into a shroud with nowhere for its cables to go, two hard drives buried in a chasm I didn’t know existed, and dust bunnies that made me wonder how air moved in there at all. The board that died in it died of moisture. I’m not going to claim the case killed it — I can’t prove that — but “leave the replacement somewhere with actual airflow” is cheap insurance either way.
Seven fans is more than this machine needs. It was also, at this price, the option that came with any fans at all.
Twenty minutes trying to open a side panel
Before any of the building, I had to get into the thing. This cost me longer than any other single step, and I want to be honest about how stupid it felt.
The right-hand metal panel had two thumbscrews at the back. Undo, slide, off. Thirty seconds.
The tempered glass panel had no screws at all. Nothing at the back, nothing at the edges, no captive screw in the corner. Just glass.
Every guide I could find assumed thumbscrews, because that’s how most glass panels used to attach — four of them, often with rubber washers. There was no YouTube video for this specific case. None of the Amazon reviews mentioned it. The manual was the usual exploded diagram that shows the panel already off and declines to explain how it got that way.
What eventually worked was widening the search away from my model and looking up how tempered glass panels attach in general. One video showed it: there’s a finger recess moulded into the edge of the frame — a shallow dent you hook a finger into — and the panel is held by ball studs seating into sprung ball sockets, the same door-catch style fastener used on cabinet doors. No threads involved. You pull, the balls pop out of their sockets, the panel comes away.
The reason I hadn’t just tried pulling is that it’s tempered glass, and tempered glass doesn’t crack when it fails — it converts into several thousand pieces at once. I was applying about a tenth of the force needed because I was braced for that.
Two things worth taking from this:
- When there’s no documentation for your specific model, search the mechanism class instead. “How do tempered glass PC panels attach” got me an answer in two minutes; “<model name> remove glass panel” got me nothing in twenty. I’d been searching for the wrong noun the entire time.
- A tool-less panel needs a confident, even pull, hands spread apart, straight out rather than twisting. Timid force at one corner just flexes the glass, which is genuinely the more dangerous thing to be doing.
Standoffs: check the bag before you count
Four standoffs came pre-installed in the tray. My board is mATX with six mounting holes, so at first glance the case was two short.
They were in the screws bag. Almost every case ships some pre-installed and the rest loose, and it’s easy to assume the pre-installed set is the whole story and leave two holes empty. Don’t — every unsupported mounting point is a spot where the board flexes when you push a connector in. All six went in.
The drive mounting saga
This was the long one.
The case shipped without proper HDD brackets or screws — a known quirk of this model, which I discovered the way you always discover these things. Meanwhile my 3.5” drive was still bolted into a proprietary plastic caddy from the old case, and that caddy didn’t fit the new bay at all.
The fix was to stop trying to adapt the caddy and just remove it, mounting the bare drive directly to the bay.
Then the screws wouldn’t bite. They’d turn, then spin loose, and I spent an embarrassing amount of time assuming the threads were stripped.
They were the wrong screws. PC cases ship two visually similar types:
- Coarse thread (6-32) — 3.5” hard drives, PSU, most case panels.
- Fine thread (M3) — 2.5” SSDs, optical drives, some fans.
Side by side the difference is obvious. In a dim case at arm’s length with one hand holding a drive, it is not. The rule worth memorising: if a screw feels “too loose” and won’t bite, you almost certainly have the wrong thread type, not a stripped hole. Stripped holes are rare. Mixed-up screw bags are near-universal.
Coarse 6-32 screws, bare drive, straight into the bay. Solid.
There’s a small satisfaction here: this is one of the two forgotten drives I found buried in the old case in part 1, spinning for years in a chasm I’d never opened. It’s now mounted somewhere I can actually see it.
The SATA connector that wouldn’t fit
With the drive mounted, the PSU’s SATA power connector wouldn’t go in. Not “was awkward” — physically would not seat. The drive’s power port sat flush against the bracket wall, and the connector’s plastic shroud is bulky enough that it fouled the bracket before making contact.
The answer is a slim-profile SATA power adapter — a short female-to-male lead with a low-profile head that fits where the fat original can’t. A couple of euros. It also had to be ordered, which meant the build sat with an unpowered drive for a few days waiting on the post.
Worth knowing this part exists before you need it. I’d never heard of it and assumed I’d have to move the drive.
First boot: the fTPM prompt
Powering on for the first time, the board threw:
New CPU installed, fTPM/PSP NV corrupted or fTPM NV structure changedThis looks alarming and is completely normal after a motherboard swap. The firmware TPM stores its state tied to the platform, and a new board means that state no longer matches.
You get two options, and the distinction matters:
- N — keep the existing state. Postpones the decision; you’ll see the prompt again on every boot.
- Y — reset the fTPM cleanly. Prompt gone for good.
Y is the right answer, with one condition: only if your drive isn’t BitLocker-encrypted. If it is, resetting the fTPM destroys the key that unlocks it and you’ll need your recovery key to get back in. Mine wasn’t, so I pressed Y and it never came back.
I reused the Windows SSD from the old system, which booted first try — Windows shuffled drivers once for the new chipset, wanted a reboot, and after that behaved as if nothing had happened. I’d expected worse.
Seven fans, stuck on red
Everything worked. Everything was also glowing solid red, with no way to change it.
Gigabyte’s RGB Fusion could see the board but couldn’t drive the fans. Nothing I clicked changed anything.
The cause is specific to budget cases like this one: the fans run off a bundled ARGB hub, and both the case’s own LED button and the motherboard header try to control that hub. The hub arbitrates badly and frequently just won’t hand control over. So the vendor software talks to the header, the header talks to a hub that isn’t listening, and you get a confident UI attached to nothing.
The fix was OpenRGB, and it worked immediately. It talks to the ARGB controller directly rather than going through the vendor’s handoff, so the argument the hub was having with RGB Fusion simply stops being relevant.
To be precise about what that fixes: OpenRGB doesn’t resolve the handoff conflict, it bypasses it. The button and header presumably still disagree. I just no longer route through the thing that cares.
All seven fans now sit on a uniform blue. Whatever else this build has been, it looks good.
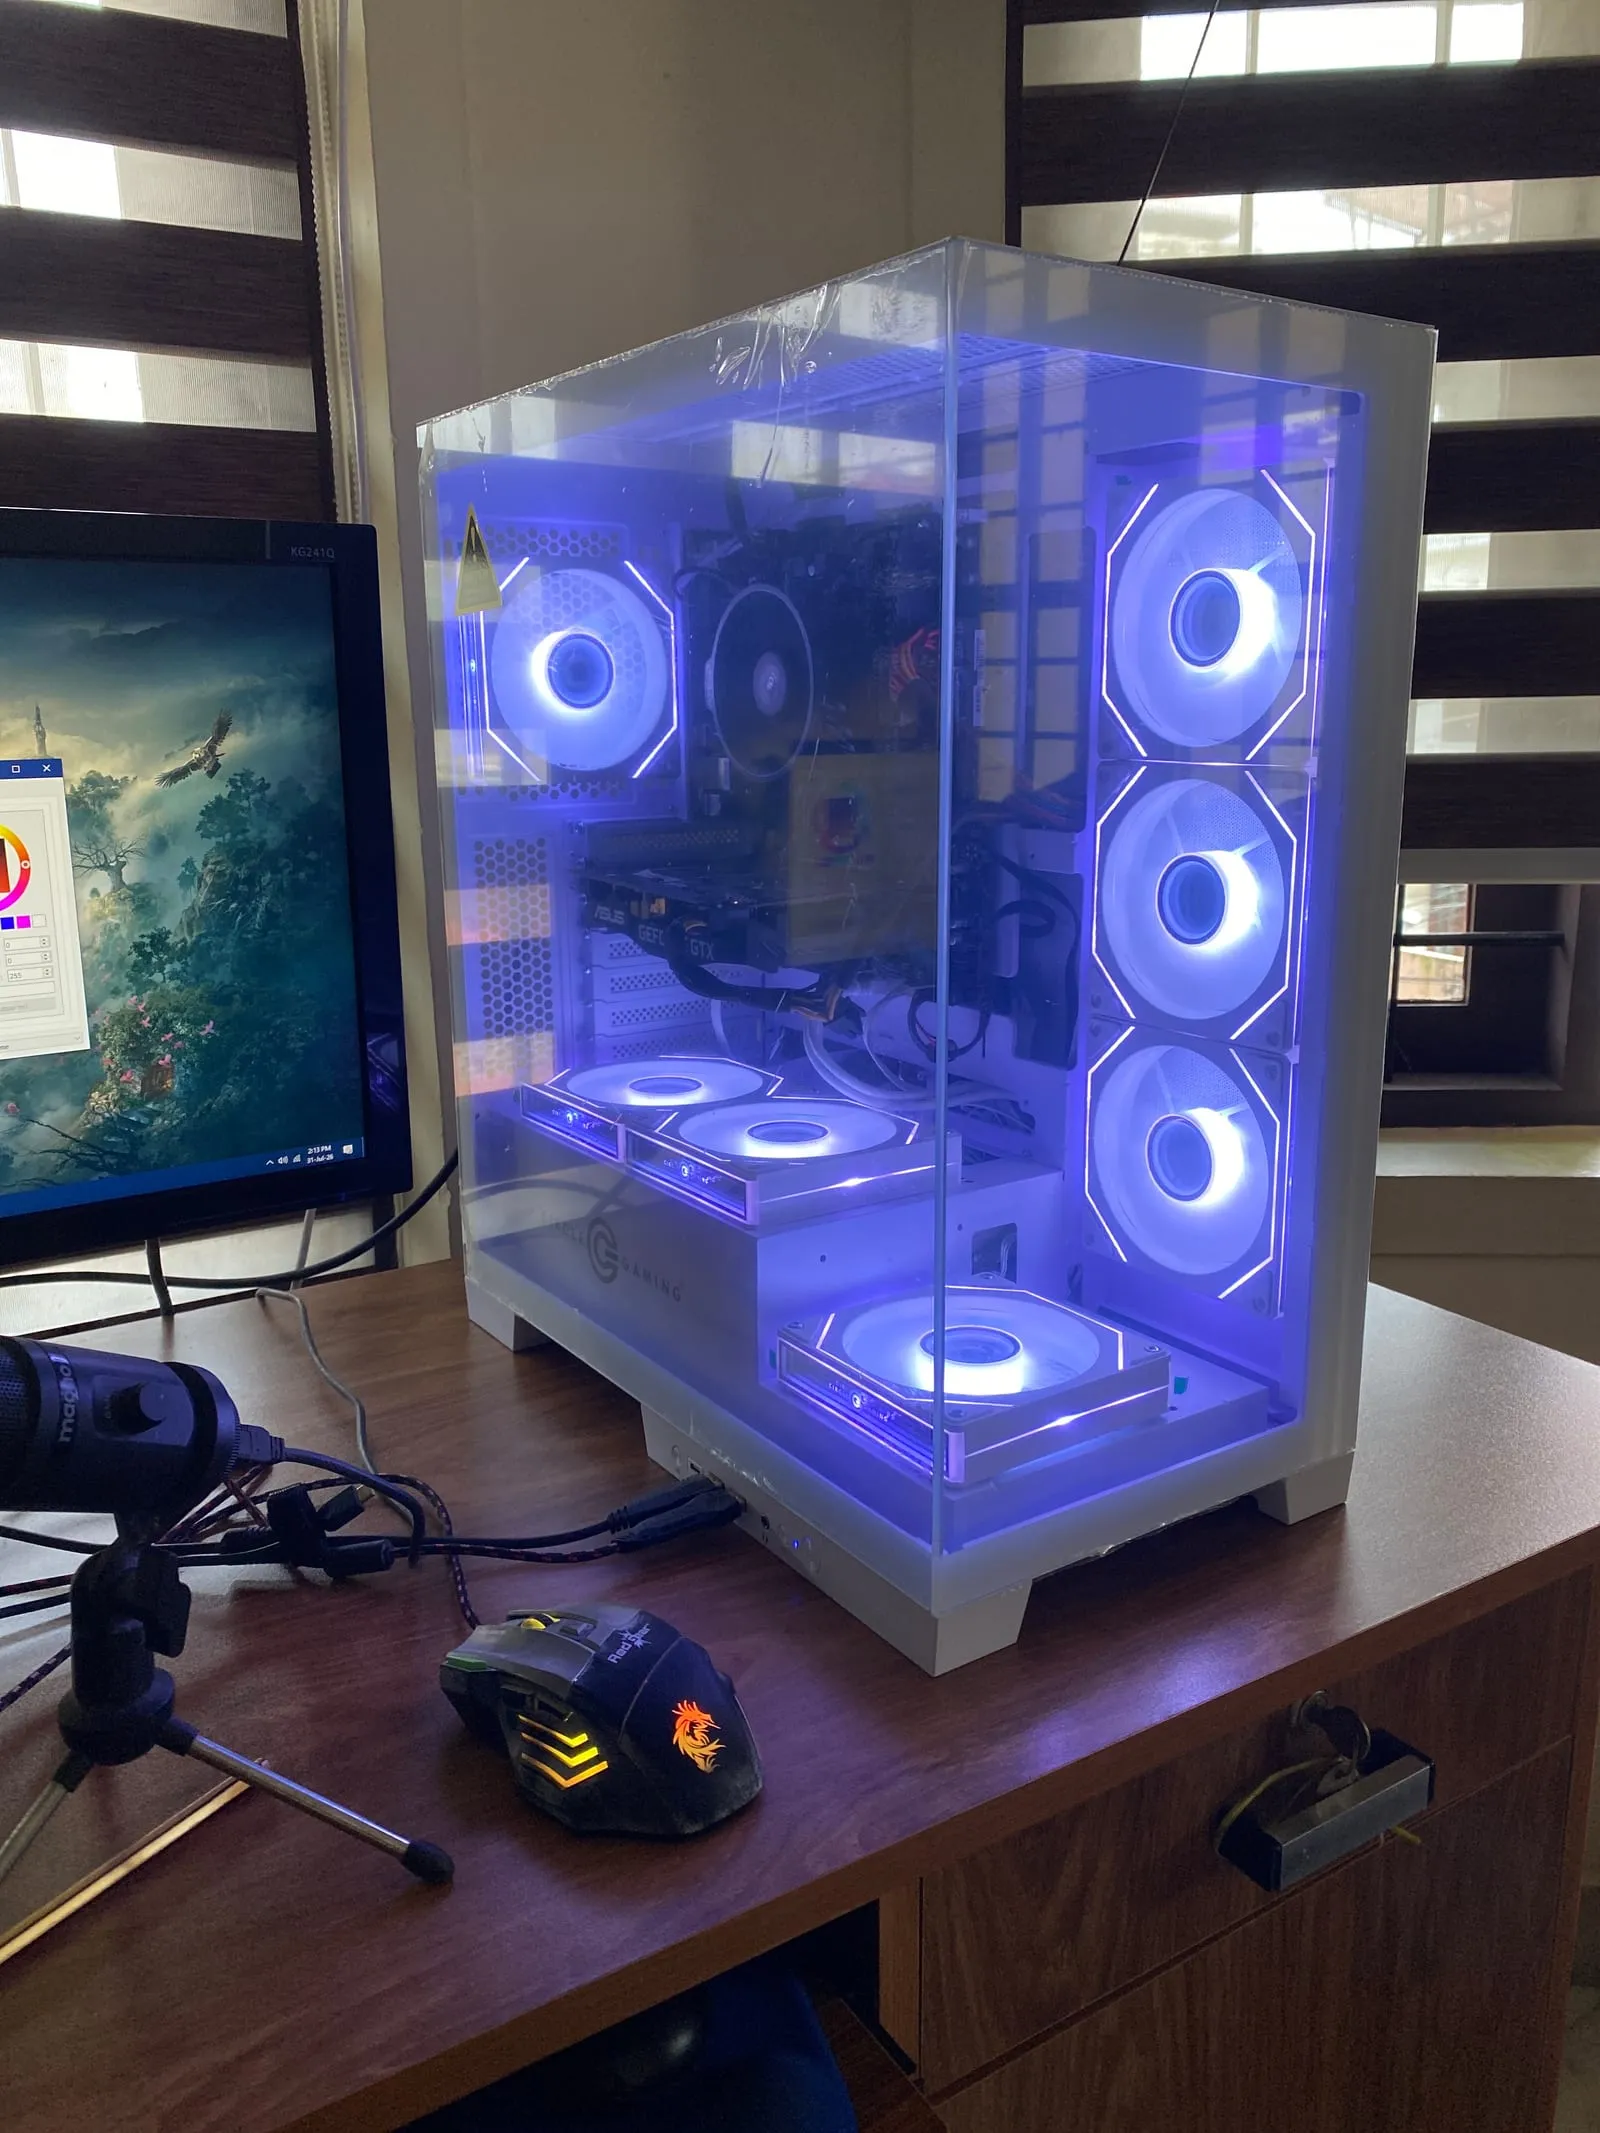
The finished thing, with OpenRGB open on the monitor next to it — the software that finally got those fans off red.
Removing the vendor bloat
Gigabyte Control Center brings a lot with it — RGB Fusion, Storage Library, Smart Backup, various update helpers. All of it is safe to remove.
The thing that stops most people is worrying they’ll take a driver out with it. They won’t: the actual drivers — Realtek WiFi, AMD chipset — install into Windows separately and are untouched by removing Control Center’s modules. And since OpenRGB drives the controller directly, removing RGB Fusion specifically doesn’t cost you lighting.
Where this leaves things
The hardware arc is done. Four posts ago this was a box that wouldn’t respond to its power button at all; it’s now a clean, cool, fully working machine with every drive mounted and powered.
I want to be accurate about one thing, though: this is a working PC, not yet a homelab. It’s currently running the reused Windows install. Proxmox, the dev VM, Tailscale, the GPU work — all of that is still ahead, and it’s the part I actually wanted when I started.
That’s part 4. The difference is that everything from here is software, which means when it breaks I can fix it without a screwdriver or waiting on the post.
The pattern across all of this, for anyone in the middle of their first build: every single problem here was mundane, documented somewhere, and solvable in minutes once identified. The time went entirely into identifying them. A panel with no screws, the wrong screw thread, connector clearance, a scary-looking firmware prompt with a safe answer, software talking to hardware that wasn’t listening — none of it was difficult. It just wasn’t written down anywhere I happened to be looking.
So now it’s written down here.